Interactive Workflow
When building your workflow with napari-assistant, you are actually building a template that will be applied to future images. Ensure you install: napari-assistant and napari-pyclesperanto-assistant for the steps below.
For example, we'd like to apply a general image processing workflow: * Gaussian Blur (Smoothing) * Otsu Threshold * Connected Components Labelling
You can test this using a deskewed image or any image really. We recommend setting the image layer name as deskewed_image as it will save you from editing the workflow later on.
Once you have your image layer of interest, go to Plugins -> Assistant (clesperanto).

Click on Remove Noise and a menu will pop-up on the bottom right.
Operation: gaussian blursigma_x: 2sigma_y: 2sigma_z: 1
Lets apply thresholding

Operation: threshold_otsu
Connected components labelling

Operation: connected_components_labeling
This isn't perfect, but it is an example of a typical analysis workflow. The workflow can be inspected by going to Plugins -> Workflow Inspector

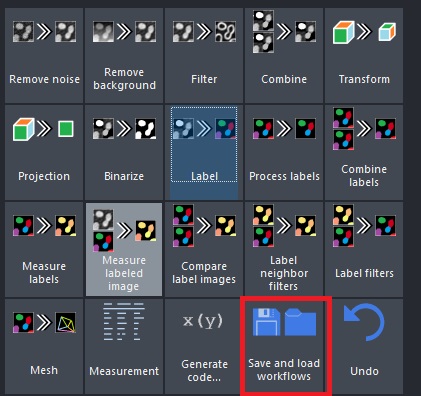
When you are finished creating the workflow, it can be saved by clicking the Save and load workflows button, followed by Export to workflow file, which will save a file with yml extension:
Once you've saved the yml file, you will need to open it in a notepad or text editor and change the input image, in this case deskewed into deskewed_image. If your image layer name was already deskewed_image, you wouldn't need to do anything. This workflow can now be used in napari-lattice plugin or in the CLI.